
Lubrication Charting (Marine & PCI)
MARINE LUBE CHARTS
Key Points to the MARINE Lube Charts Tile
Designated area for managing lubrication for assets by account.
Users can leave notes on a lube chart for future reference.
Assets are grouped by account.
Organized Lists can be printed.
Excel sheets can be created.
Security Rights Required
Can Include Asset in Lube Chart; View Lube Chart; Can Publish Lube Charts
Detailed Description of Lube Charts Tile
The Lube Charts Tile helps organize lubrication requirements for related assets, ideal for vessels using various lubricants.
Add assets to a Lube chart via the asset edit page and select "Include Asset in Lube Chart".
Use the "Print Preview" button to view a preview of the lube chart.
Publishing a Lube Chart makes it visible in the account's "Published Charts" folder. The publisher also receives an emailed PDF copy.
The sortable order is based on numbers in the far-right column. Note: "Unit ID" on the asset isn't used for sorting.
Quick Steps to Adding Existing Assets to a Lube Chart
Select the Assets Tile from the Dashboard.
Search for and select the desired Asset.
Edit the asset.
Check the box labeled "Include Asset in Lube Chart."
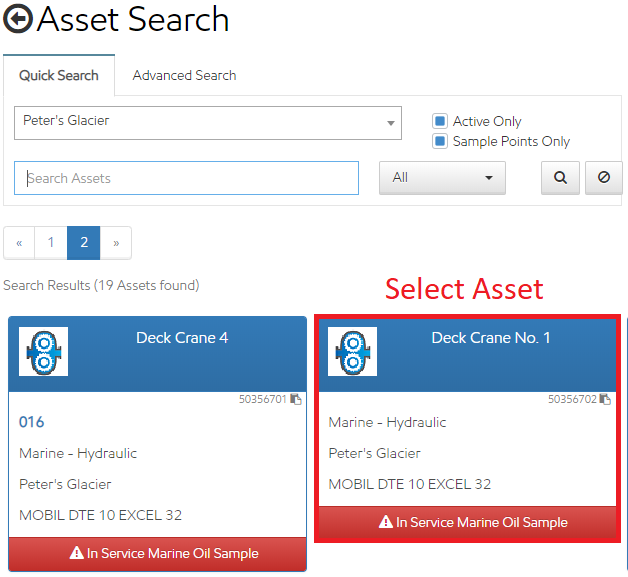
The lube chart asset's card in the Asset Search.
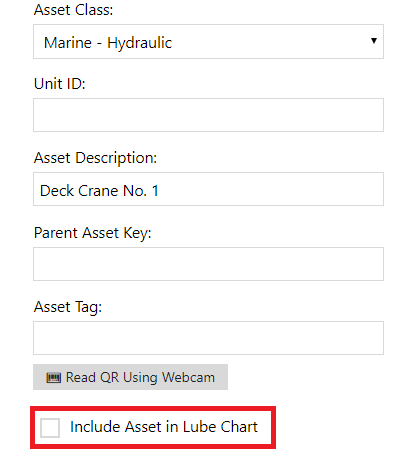
Include Asset in Lube Chart in the Asset Editor.
Security Rights Required
Can Include Asset in Lube Chart; View Assets; Create Assets; Edit Assets
Quick Steps to Preview a Draft Lube Chart
Select the Lube Charts tile from the Dashboard.
Search for the desired account.
Ensure the assets are in the desired order.
Click Print Preview in the upper right corner.
Note: The print preview should now include the same formatting seen in the published version of the lube chart.
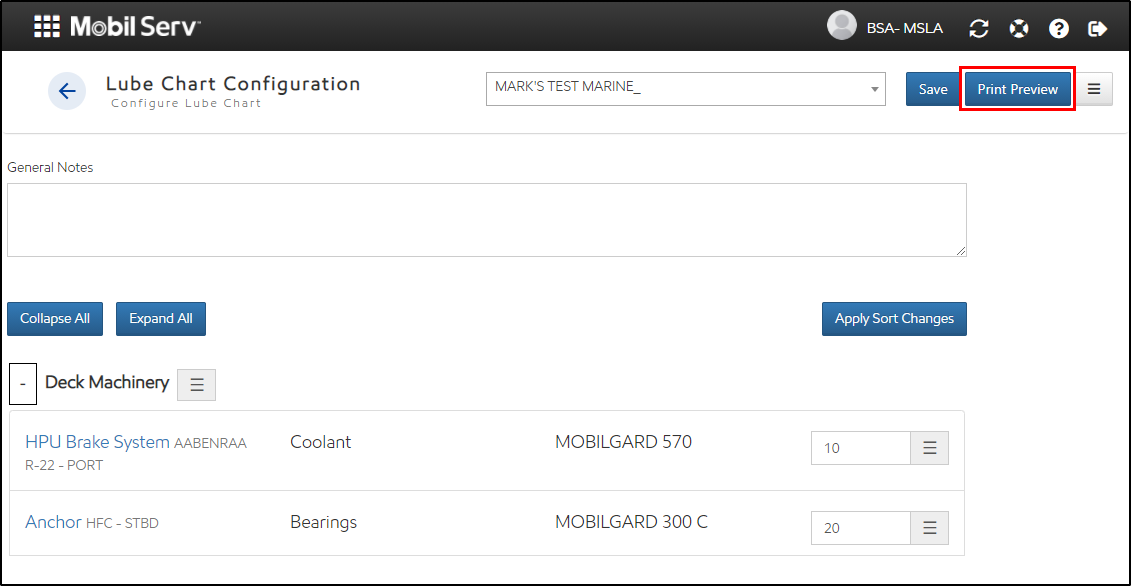
Print Preview in the Lube Chart Configuration page.
Security Rights Required
View Lube Chart; Can Publish Lube Charts
Quick Steps to Publish Lube Charts
Select the Lube Charts tile from the Dashboard.
Search for the desired account.
Ensure the assets are in the desired order.
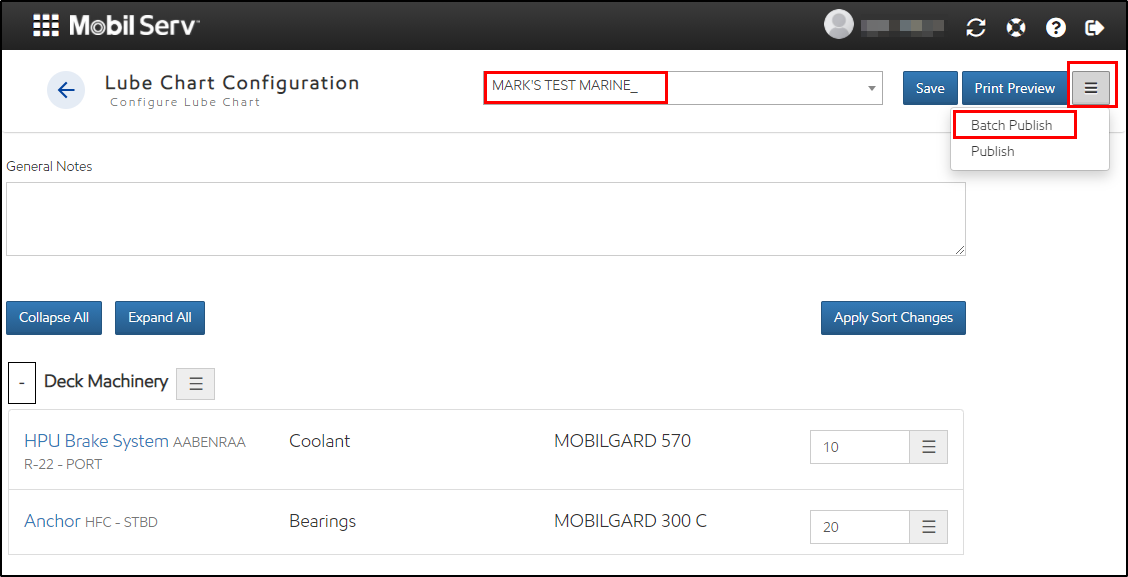
Click Hamburger in the upper right corner.
Select Publish or Batch Publish.

Publish in the Lube Chart Configuration page.
Batch Publish Lube Charts
Prerequisite: Create an Excel spreadsheet with account names for Batch Publish, listed in the first column. Ensure names match exactly.
Select the Lube Charts tile from the Dashboard.
Select the Hamburger in the upper right corner.
Select Batch Publish.
Select Browse to select file to upload.
Once file is selected, select upload.
Security Rights Required
View Lube Chart; Can Publish Lube Charts
Email Published Lube Charts
Select the Accounts tile on the dashboard.
Search for the account with attachments to send.
See the Attachments panel on the right side.
A folder can be selected in its entirety, or individual files selected.
After selecting the file(s), right-click in the file list within the attachment panel and select Share.
A new window asks for the email address(es) to send the file(s) to.
Leave a space between email addresses.
Recipients receive an email with attached files. If file attachment fails, download links are provided.
PCI LUBE CHARTS
Key Points to the PCI - Lube Chart Functionality
Designed to help your Exxon representative create a comprehensive lube chart that tracks all lubricant components and their related details.
Provides a systematic method for managing lubricants across assets within each account
Ability to create or modify lube charts whether the device is connected or not connected to the network
Establishes a clear, tiered asset structure while documenting each lube point’s recommended lubricant, location, asset tag, application method, and associated maintenance tasks.
Supports creating a primary (parent) asset that includes multiple smaller components or lube points as child assets.
Designated area for managing lubrication for assets by account.
Contact your ExxonMobil representative for more information.
Security Rights Required
View Mobile Lube Charting, Import Lube Charts, ExxonMobil User
Creating and Modifying Lube Charts and Lube Chart Assets
The Lube Chart asset is a non-sampling point asset type designed to track lubricant recommendations, schedules, and related information for equipment.
Lube chart assets can be created or modified in MLA by your Exxon representative by using various tools that are available, including the existing native asset tile that can be used to view or edit non-sampling assets. The Excel Add-in can also be used to mass update assets, while the existing export feature can export the list of assets into a flat table, allowing the list to be amended or customized before providing to a customer.
Lube Chart and other non-sampling assets cannot be viewed directly under the Asset tile.
When searching for non-sampling assets (Equipment, Lube Chart) on the asset tile, uncheck ‘SamplePoints Only’ to include non-sample point assets in your search.
Using the Mobil Lubricant Analysis Sample Scan Web App to Create or Modify Lube Charts
The Mobil Sample Scan Web App was designed for mobile devices and tablets in order to easily modify or create new lube chart components while connected to the network or working offline.
Lube Charts Functionality within the App
Configure the account(s) that you would like to update or create a new Lube chart against.
Create a new lube chart directly in the field
View or update existing lube charts already added to MLA
Manage lube charts both while connected or not connected to the network
View Parent/Child relationships with the interactive parent/child tree.
View and search for assets by different attributes including location, recommended lubricant, or unit ID
Configuring Assets for Lube Charting in the Mobil Sample Scan Web App
Before lube charting, select and download the account(s) you would like to update or create new assets for a Lube chart. Accounts need to be assigned to your user profile in order to appear on the list to download.
Navigate to the My Offline Data tab.
In the Assets section, select all the accounts for Lube Charting.
Once selections have been made, click the Download button in the upper right corner.
A notification that the work queues have been synched will appear at the top, and all Lube Chart assets will be listed under Lube Charting.
Note: If lube charting is to be completed without network connectivity, this step must be completed first before going offline.
Lube Charting - Creating a New Asset
Select the vertical ellipses next to the asset that you wish to add a component to.
Select Add Component.
Choose to either create a component from scratch, add an existing component or copy components from an existing asset.
On the asset screen, fill in the Asset Description.
Complete the additional fields as needed and select SAVE at the bottom of the form.
The component should be successfully completed
Lube Charting - Adding or editing a component
Select the vertical ellipses next to the asset that you wish to add a component to.
Select Add Component.
Choose to either create a component from scratch, add an existing component or copy components from an existing asset.
On the asset screen, fill in the Asset Description.
Complete the additional fields as needed and select SAVE at the bottom of the form.
The component should be successfully completed
Using the Import tool to Create a New Lube Chart
The import functionality allows your Exxon representative to easily import an existing lube chart after some data cleanup.
Requirements for using the Import Tool
Lube chart data is available in a supported excel format (.CSV, .XLXS, or .XLS)
A consistent layout is followed for each row of data, and a header row is defined.
The excel sheet does not contain any merged cells.
The sheet does not contain any empty rows or columns.
All data is on one single tab. Multiple tabs are not supported.
A column with your asset’s asset description is in the sheet. (Required field)
Importing your Excel Sheet
Navigate to the Asset tile in MLA.
On the dropdown in the upper right of the page, select Lube Chart Import
Select the file that needs imported.
Select which row contains the header row in your sheet.
Select the account that the lube chart should be created under or note the column that the account is defined in.
Continue to map each Lube Chart field to the respective column in your sheet, starting with Asset description.
If the data is not available, leave the setting as Don’t Map. Only the Asset Description is a required field.
Click Submit. Lube Chart creation typically takes ~ 5 to 30 minutes once submitted.
Note: The Import feature in MLA does not support creating the parent/asset relationships.
Lube Charting - Parent/Asset Relationship
Connecting individual components of your equipment to parent assets assists with locating individual lube and sampling points. The recommended approach for the parent/asset relationship is to use the non-sampling Equipment asset class. After creating your parent Equipment asset, create assets underneath the Equipment asset for each of your lube points or sample points.
Parent/Child interactive tree in the Web App
When viewing Lube chart assets in the field on a mobile device, it’s recommended to use the Mobil Lubricant Analysis Sample Scan Web App. This App enables the use of an interactive tree that displays the Parent/child relationships to help find your lube chart assets.
Preferred Lubricant
To eliminate the need for searching, set-up specific lubricants to always appear at the top of the recommendation list in the Mobil Lubricant Analysis Sample Scan Web App for quick selection on-site.
Select the Account tile from the Landing page.
Search and select your account.
On the lower right of the page, select the edit pencil icon in the Preferred Lubricants panel.
Search and select the lubricants on the left and add them to the right.
Select Save to close the screen.
The lubricants should not show at the top of the lubricant list for this account while working within the Mobil Lubricant Analysis Sample Scan Web App.