
Marine - Lube Charts
Key Points to Lube Charts Tile
Designated area for managing lubrication for assets by account.
Users can leave notes on a lube chart for future reference.
Assets are grouped by account.
Organized Lists can be printed.
Excel sheets can be created.
Security Rights Required
Can Include Asset in Lube Chart; View Lube Chart; Can Publish Lube Charts
Detailed Description of Lube Charts Tile
The Lube Charts Tile helps organize lubrication requirements for related assets, ideal for vessels using various lubricants.
Add assets to a Lube chart via the asset edit page and select "Include Asset in Lube Chart".
Use the "Print Preview" button to view a preview of the lube chart.
Publishing a Lube Chart makes it visible in the account's "Published Charts" folder. The publisher also receives an emailed PDF copy.
The sortable order is based on numbers in the far-right column. Note: "Unit ID" on the asset isn't used for sorting.
Quick Steps to Adding Existing Assets to a Lube Chart
Select the Assets Tile from the Dashboard.
Search for and select the desired Asset.
Edit the asset.
Check the box labeled "Include Asset in Lube Chart."
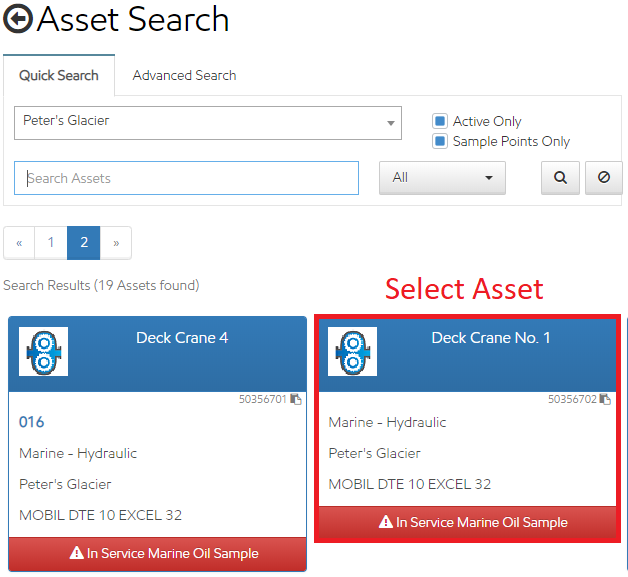
The lube chart asset's card in the Asset Search.
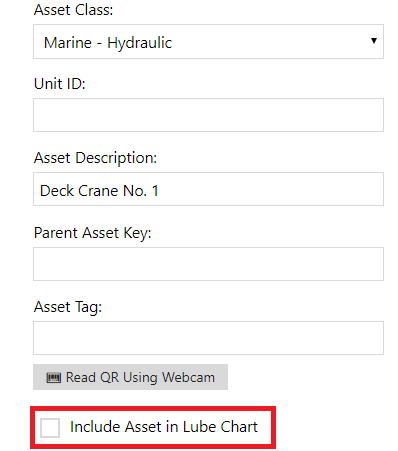
Include Asset in Lube Chart in the Asset Editor.
Security Rights Required
Can Include Asset in Lube Chart; View Assets; Create Assets; Edit Assets
Quick Steps to Preview a Draft Lube Chart
Select the Lube Charts tile from the Dashboard.
Search for the desired account.
Ensure the assets are in the desired order.
Click Print Preview in the upper right corner.
Note: The print preview should now include the same formatting seen in the published version of the lube chart.
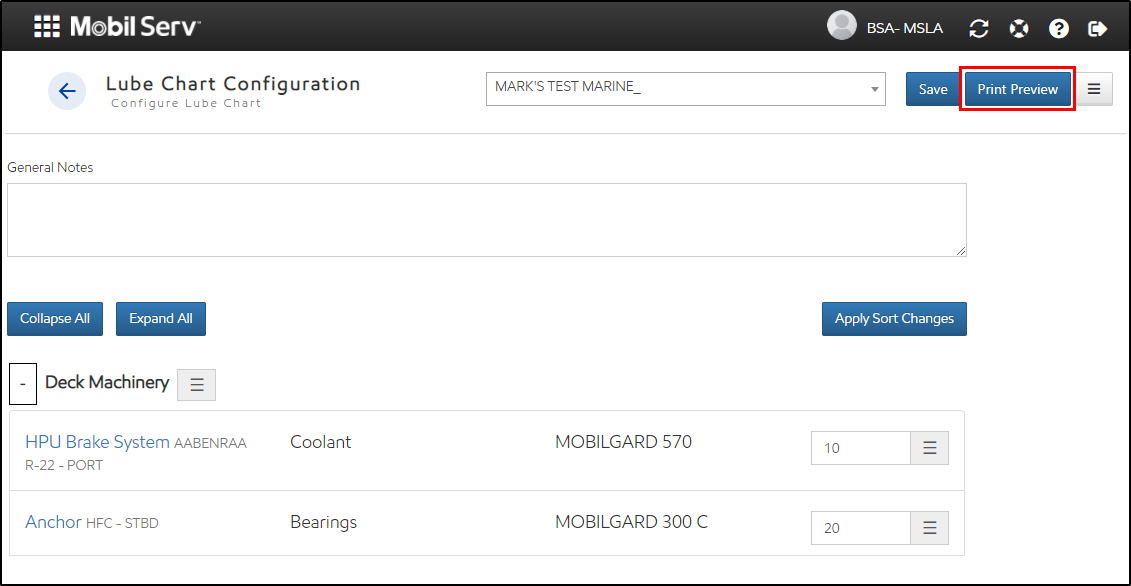
Print Preview in the Lube Chart Configuration page.
Security Rights Required
View Lube Chart; Can Publish Lube Charts
Quick Steps to Publish Lube Charts
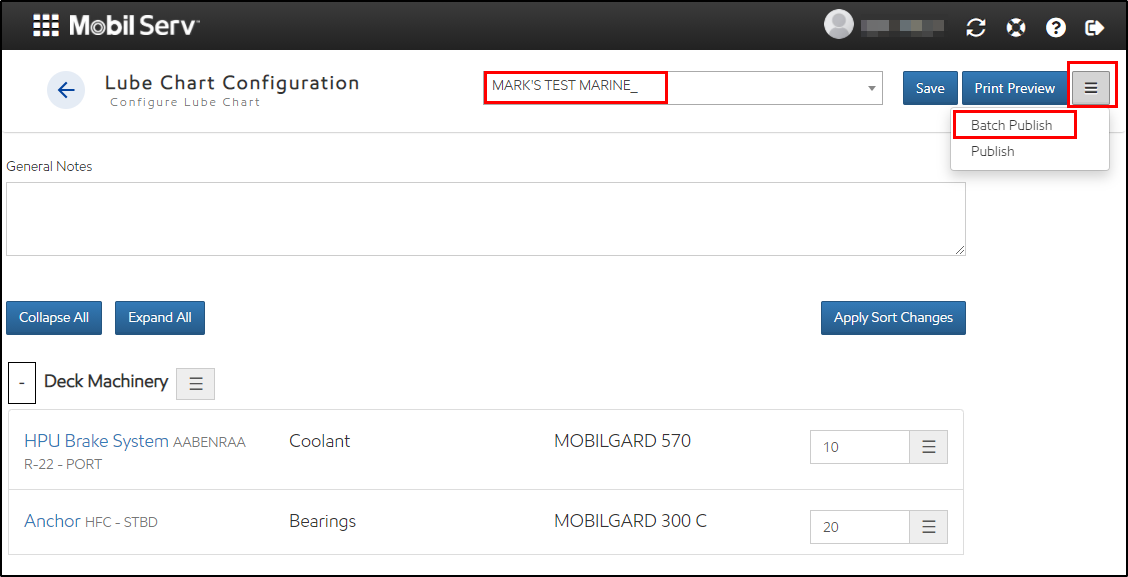
Select the Lube Charts tile from the Dashboard.
Search for the desired account.
Ensure the assets are in the desired order.
Click Hamburger in the upper right corner.
Select Publish or Batch Publish.

Publish in the Lube Chart Configuration page.
Batch Publish Lube Charts
Prerequisite: Create an Excel spreadsheet with account names for Batch Publish, listed in the first column. Ensure names match exactly.
Select the Lube Charts tile from the Dashboard.
Select the Hamburger in the upper right corner.
Select Batch Publish.
Select Browse to select file to upload.
Once file is selected, select upload.
Security Rights Required
View Lube Chart; Can Publish Lube Charts
Email Published Lube Charts
Select the Accounts tile on the dashboard.
Search for the account with attachments to send.
See the Attachments panel on the right side.
A folder can be selected in its entirety, or individual files selected.
After selecting the file(s), right-click in the file list within the attachment panel and select Share.
A new window asks for the email address(es) to send the file(s) to.
Leave a space between email addresses.
Recipients receive an email with attached files. If file attachment fails, download links are provided.