
Dashboard
Key Points to Managing your Dashboard
Upon login, a customized dashboard is presented to efficiently manage your tasks. This Dashboard is security right-driven, and can be tailor-made per user for displaying varied data.
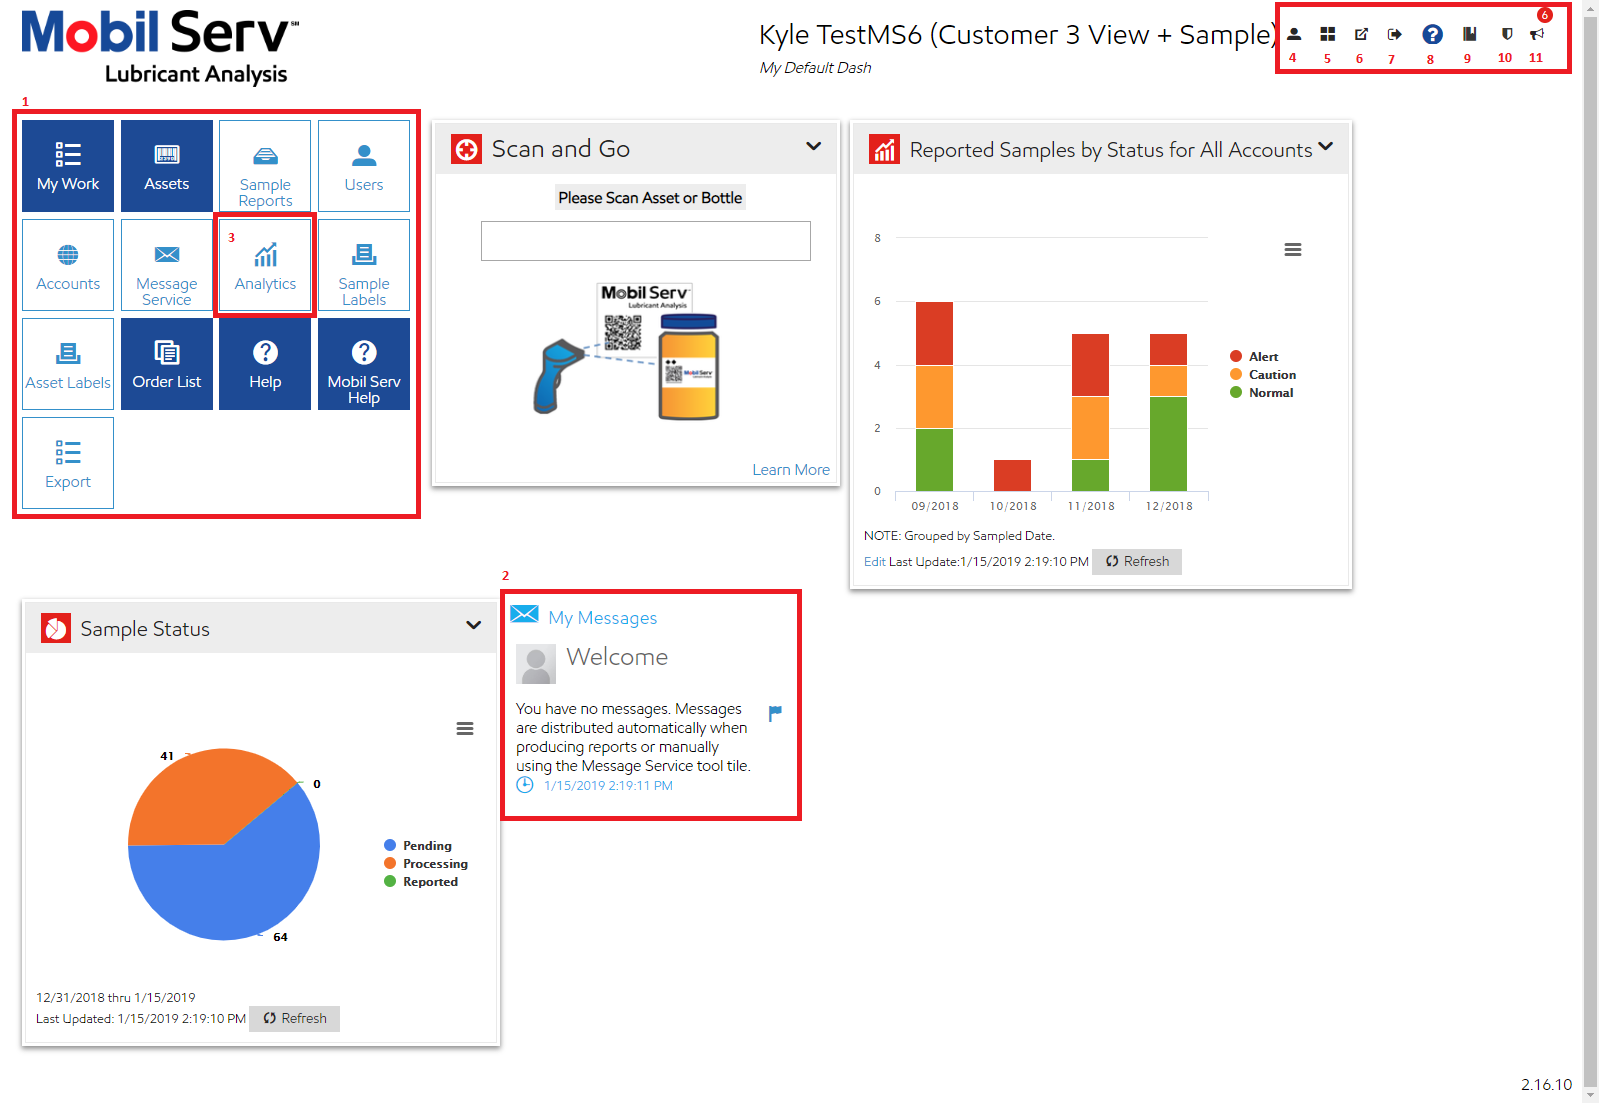
The image above shows a typical dashboard.
Detailed Description of Dashboard Image
Tools/Icons/Tiles: Specific security roles will see certain tiles which let you configure the system or schedule work.
My Messages: Displays any messages sent to you, including manual messages, videos, or auto-generated reports. Messages are removed or checked off once acknowledged.
Analytics: Enables the addition of charts displaying aggregated or trended data from completed workflow reports.
User Profile: Navigates to 'My Profile', where you can update your user information and settings.
Add Tiles: Customize the tiles on your dashboard.
Switch Dashboards: Create and select between multiple dashboards as per your business needs.
Log Out: Logs out the current user.
Help/Support: Leads to the Knowledge Base for browsing answers.
Terms and Conditions: Read the terms and conditions.
Privacy Policy: Review the Data Privacy Notice EU.
Announcements: Shows recent system updates. Select to view the list of latest changes and details.
Send a Message
You can send a message using the Message Service. Here's how:
Go to the Message Service Tile on the Dashboard.
Select 'Create' to open the Message Details window.
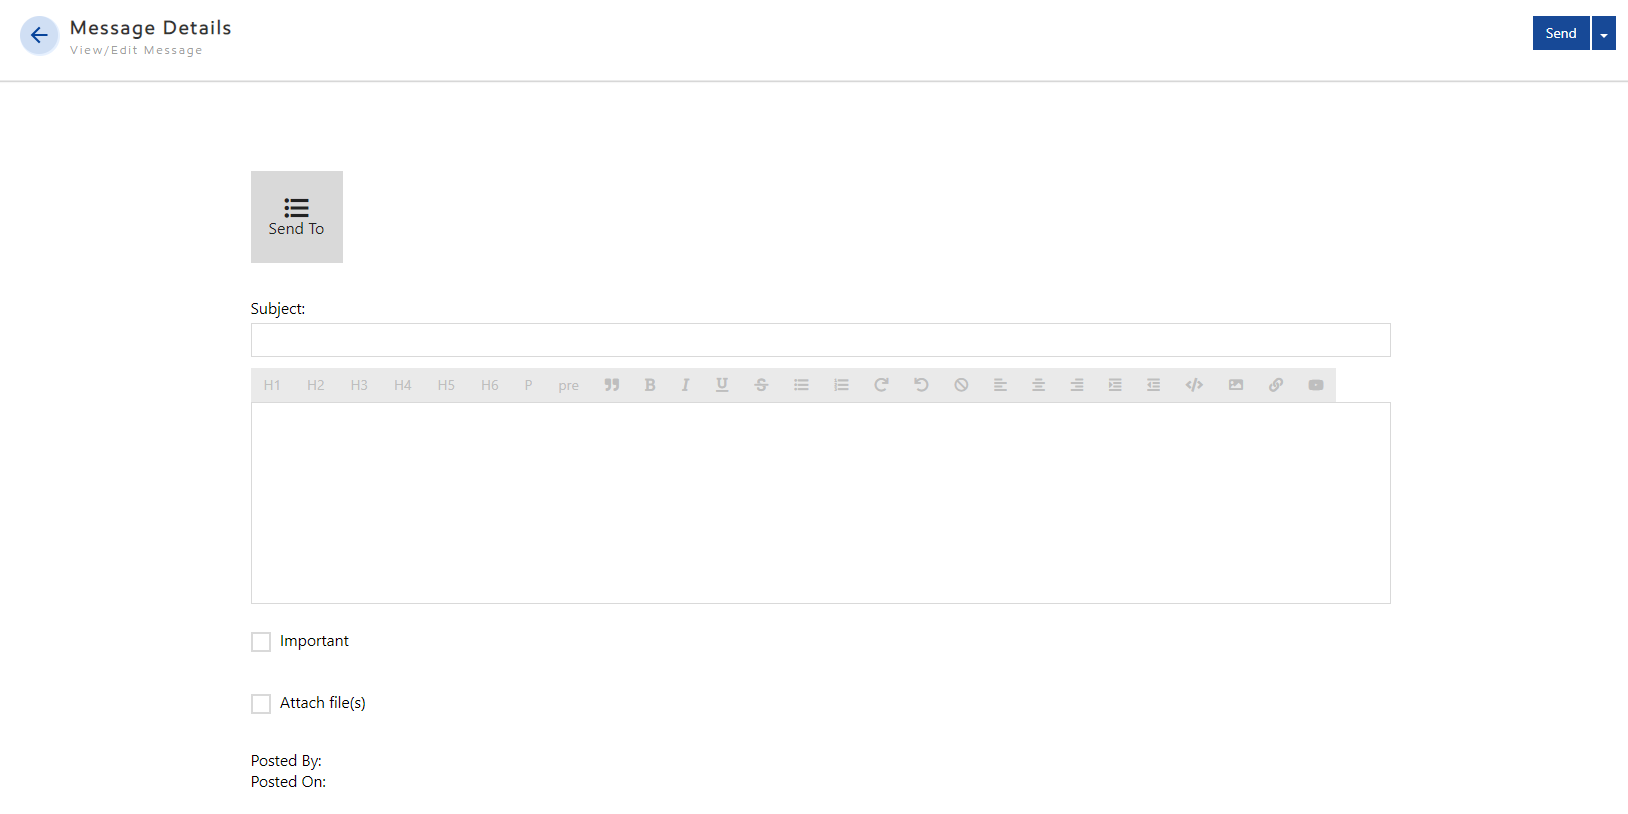
Fill in the Subject and body of the message.
Mark as important, if necessary.
Check if files are attached. Follow prompts if yes.
Select Send To. The Recipient Criteria pop-up appears.
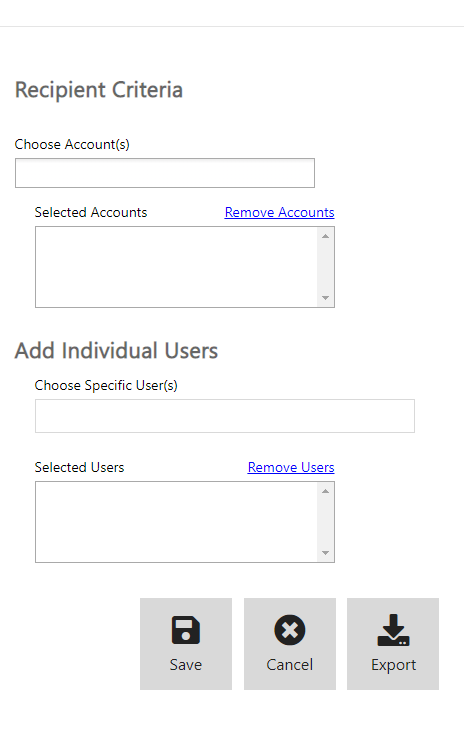
Choose Account(s): All active users of that account receive the message.
Choose Specific Users: Only selected users receive the message.
Choose Both: Select both accounts and users.
Select Save to populate the "To:" section of your message. Select Cancel to exit without populating the "To:" section of your message. Select Export to save your selections for a file.
Select Send to dispatch the message. Select Cancel to cancel the message.