Cylinder Condition Monitoring (CCM)
Start up PDFs
Configuration
Criteria for a vessel to use the CCM program:
International Marine account
CCM instrument assigned to the vessel
Vessel's engine and cylinders configured with a parent/child relationship.
Vessel Account Configuration
Select the Accounts tile.
Search the vessel you are trying to configure for CCM.
Select the vessel name to open the in the Account Editor.
Scroll down until you see the "Business Lines" tile on the right side. Mouse-over the tile until you see a pencil icon appear. Select the Pencil.
On the next screen, check the box “Is CCM Enabled.”
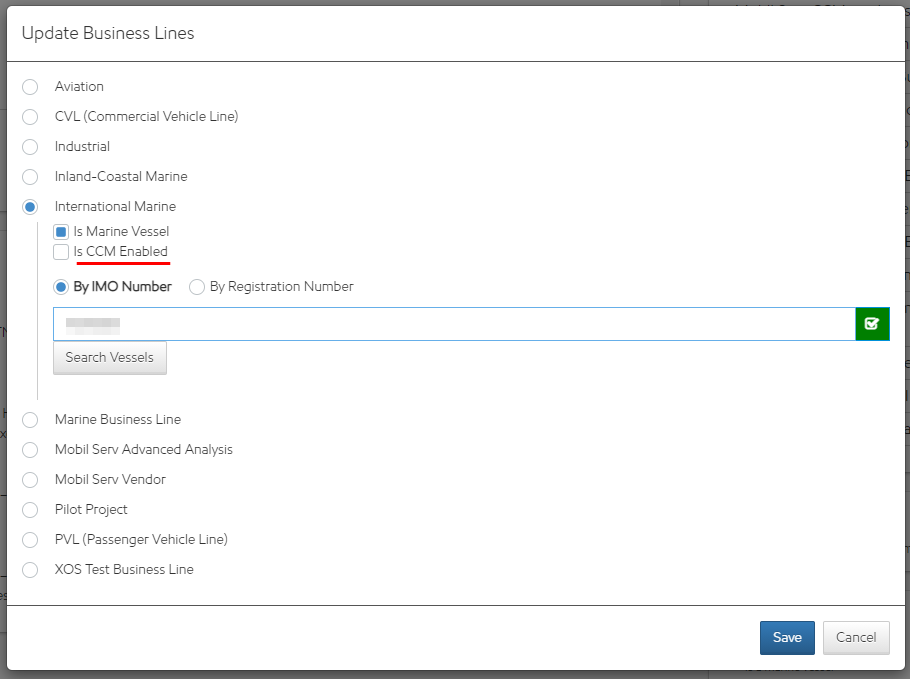
Select Save to save the changes.
Engine Asset Configuration
Once a vessel is configured, the assets to be used in conjunction must be configured properly. A Marine Engine asset first needs to be configured. The CCM workflows are only available for engines with the Service Type attribute set to “SD – Slow Speed – Crosshead”.
To configure the Asset:
Select the Assets Tile
Search the Asset.
Select the matching result to the Asset you are trying to modify.
Select Edit in the top-right corner.
In Attributes, set service type to 'SD - Slow Speed Crosshead' to reveal the 'Is CCM enabled' box.
Check the ‘Is CCM Enabled’ box.
Click the Save button at the bottom of the screen.
Once Is CCM Enabled is checked, the attributes for CCM become visible. Note: the number of cylinders determines how many cylinder fields are visible on the logbook.
Cylinder Asset Configuration
After configuring an engine, set up each cylinder as Marine - Scrapedown assets within the account. Then associate the cylinders as children of the Marine – Engine asset.
Open up the Main Engine asset and copy the Asset Key, which is located under the ‘attribute’ section
Create Marine - Scrapedown asset.
Copy the Main Engine Asset Key into the ‘Parent Asset Key’
Fill out attributes and ensure NextGen CCM = Yes
Select Save
Day Tank (Fresh Cylinder Oil) Asset Configuration
For CCM Enabled vessels, create a Marine - Fresh Cylinder Oil asset as a child of the Marine - Engine asset.
Ensure the parent asset key is on the day tank.
Questionnaire Manager
Key Points to Questionnaire Tile
Data is entered in questionnaire to provide a QR code.
QR Code is used to connect the CCM instrument to the internet on the vessel.
All IP information is provided by the vessel prior to installation.
A Questionnaire must be completed prior to placing an order.
Accounts must be International Marine to view/order the CCM equipment in Orders Page
Quick Steps to Create a Questionnaire
Select the CCM Survey Manager Tile from the Dashboard.
Select the + sign on the left side of page.
The Add CCM Questionnaire window appears.
Choose the Account.
Fill in a Title for the questionnaire.
Check Preconfigure for offline if this instrument is not using MSLA online services.
Select Show to provide additional details if the instrument is connecting to the internet of the vessel.
Check Vessel Setup (CCM Team) to verify setup is complete.
Check Order Approved (NPP Team) when approved.
Notes:
Show only appears if Preconfigure for offline is not checked.
Order Approved (NPP Team) only appears when Vessel Setup (CCM Team) is checked.Select Save to save the questionnaire or Cancel to exit without creating the questionnaire.
Quick Steps to Edit a Questionnaire
Select the CCM Survey Manager Tile from the Dashboard.
Select the pencil sign to the left of the account questionnaire.
The Edit CCM Questionnaire window appears.
Edit any fields that require change.
Notes:
Questionnaire Show only appears if preconfigure for offline is not checked.
Order Approved (NPP Team) only appears when Vessel Setup (CCM Team) is checked.Select Save to save changes or Cancel to exit without saving changes. Select Delete to delete the questionnaire.
Reprint QR Code
Select the CCM Survey Manager Tile from the Dashboard.
Select the QR Code to the right of the account questionnaire.
A Packing List Report with the QR code appears.
Select Print or Save.
Sample Registration
Online
The purpose of this document is to provide instructions on how to register your scrapedown samples. Before you begin:
Ensure you have Mobil Lubricant Analysis installed and you have activated your account.
It is recommended that you use your scanner for the registration process.
Log on to Mobil Lubricant Analysis when you are connected to the internet, so the scrapedown workflow will be available.
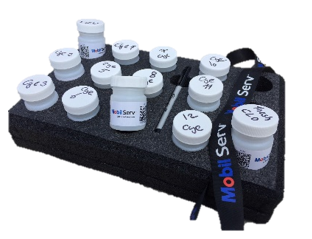
Have your scrapedown samples in the 45ml bottle.
Instructions
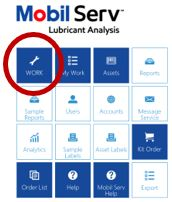
On your dashboard select the Work tile.
Select Work Queue.
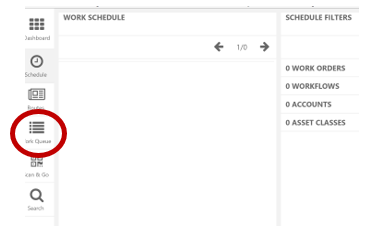
Select the cog wheel to set up the CCM workflow for your vessel. (One time task - once it is established it will be always available for you.)
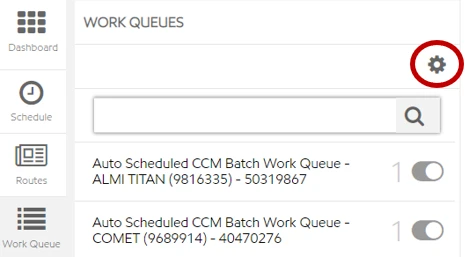
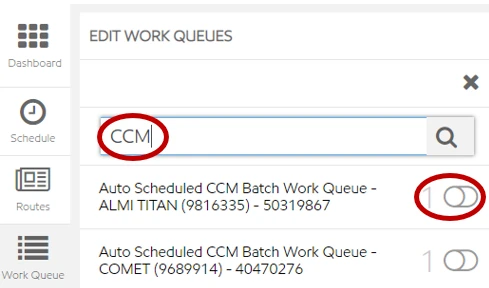
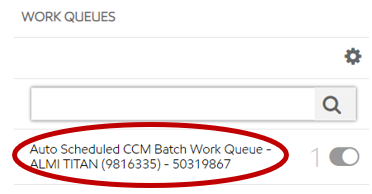
Type ‘CCM’ in the search field. This will make sure that only one workflow will be displayed.
It would say: ‘Auto Scheduled CCM Batch Work Queue’ and mentions your vessel name / IMO thereafter.
(if not available, please synchronize, so the latest files will be available).
Toggle the on/off option.
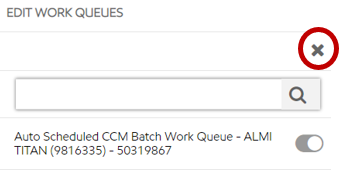
Select the cancel button. To stay working online move to step 11.
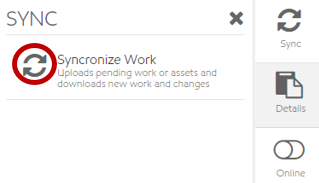
To Work Offline - Select the sync button.
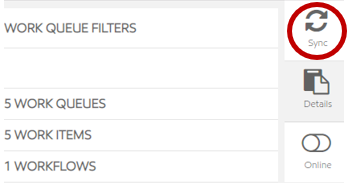
Select synchronize work.
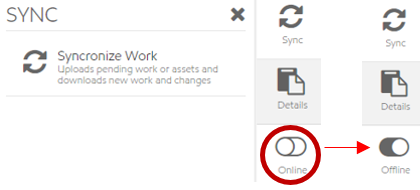
Once sync has completed, toggle the online button to offline.
You are now ready to work in offline mode and can complete the logbook without being connected to internet.
If you close browser, please use URL -
https://ucld.us/workforce/ to go back to MLA.
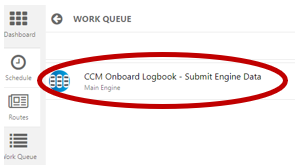
Select the workflow – Auto Scheduled CCM Batch Work Queue you have just created.
(The other workflow will be for your other ‘in service oil analysis’ samples)
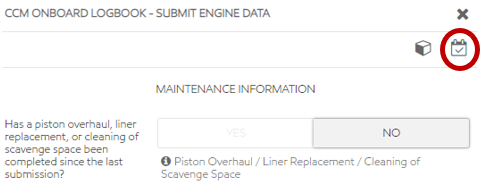
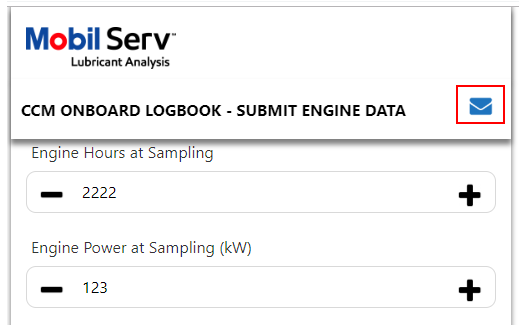
Select - CCM Onboard Logbook
Once the Logbook opens, fill in the fields.
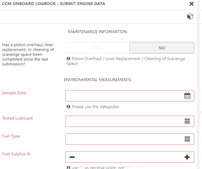
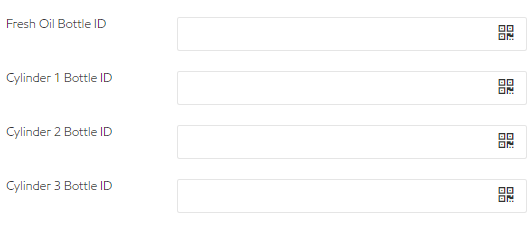
After data entry, complete the bottles.
Ensure fresh cylinder oil from day tank/fuel rail and scrapedown samples are readily available.

28a. Select the Fresh Oil Bottle ID field …

28b. …and use your scanner to scan the bottle QR code. Alternatively, you can type in number below the QR code (e.g., m000052072).
If scanning fails, ensure your scanner's programming matches your non-English keyboard language. Refer to instructions.

Continue scanning all sample bottles. Ensure to match scanned scrapedown samples with their corresponding cylinder numbers in the workflow.

Once bottles have all been entered, scroll to the top of the form and select the complete work button.
The user will receive a green message at the top of the screen that says, "Workflow submitted successfully."
Note: A report reaching 'registered' status on the CCM asset indicates successful process completion.
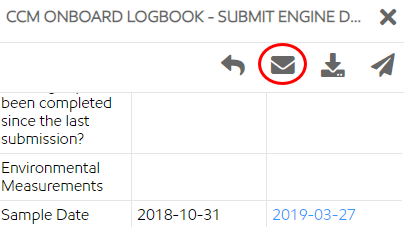
You'll see a screen to review all data and compare with any previous submissions, if available. If you need to correct entries, select the return icon.
If working offline, skip to step 32.
If working online, Select the send button to submit your registration.

If you are not connected to the internet via MLA, you can email the data as well.
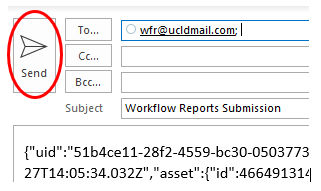
Select the email button. This will auto populate an email with the data.
Hit ‘send ‘in your email application.
Congratulations, you have successfully registered your scrapedown samples. You can now move on and run the measurements on the CCM Analyzer.
Please refer to the separate instructions provided.
HTML Offline
The purpose of this document is to provide instructions on how to register your scrapedown samples in HTML Offline.
Before you begin:
HTML Offline Logbook is vessel and asset specific.
It is recommended that you use your scanner for the registration process.
Ensure the workform has been received and saved on desktop.
Have your scrapedown samples in the 45ml bottle.
The workform is reusable once received.
Preferred browser is Chrome/Edge/Firefox.
Instructions
If you have already received your workform, skip to step 5
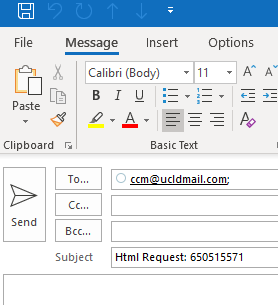
To request the workform, send email to ccm@ucldmail.com with one of the following subjects:
Html Zip Request: "asset ID"
This will send back a zip file.
Example - Html Zip Request: 650515571
Html Request:
This will send back a list of available assets associated with user's profile.
Html Zip Request is case-sensitive.
Asset should not be surrounded by quotes.
Asset should be a Marine – Engine (Slow Speed)
User requesting must be assigned to the vessel.
Within minutes you should receive an email with the workform.
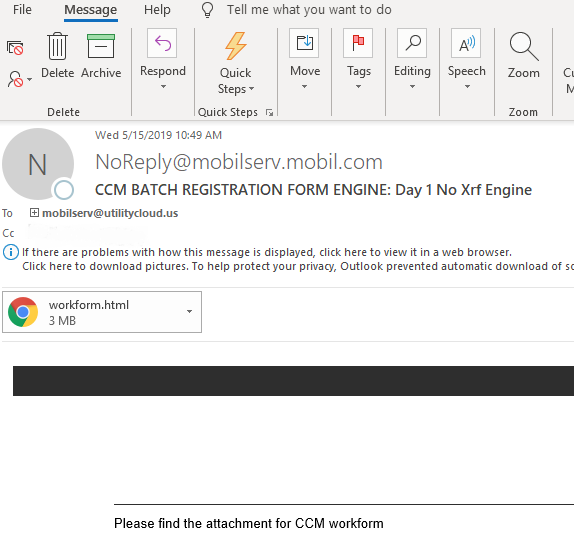
Save the attachment (workform) to your desktop.
Select the workform to open.
Complete the workflow.
After data entry, complete the bottles.
Ensure fresh cylinder oil from day tank/fuel rail and scrapedown samples are available.
…and use the scanner to scan the bottle QR code. Alternatively, type in number below the QR code (e.g m000052072). If scan fails, check scanner's programming matches your keyboard language (non-English settings). Refer to scanner instructions.

Continue scanning all sample bottles. Ensure to match scanned scrapedown samples with their corresponding cylinder numbers in the workflow.
When you have finished scanning all your bottles, the envelope will turn blue. Select the envelope icon, which will download two files:
JSON (or .dat file)
Email to submit JSON.
Attach the JSON (or .dat file) to the email and select send.
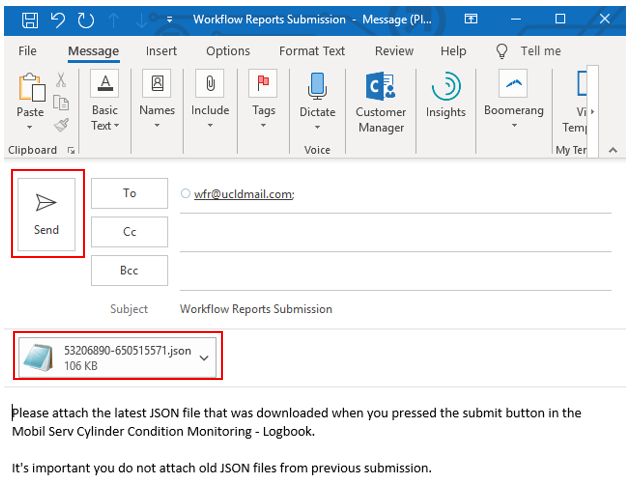
After the offline logbook is submitted, a confirmation email is sent. The "original payload" link will contain the email and the .dat or .json attachment in it. The "original payload" is NOT the .dat or .json itself.
Workform does not validate unique bottle IDs before submission but does validate on being received by Utility Cloud.
The QR code field supports manual entry or hand scanners for bottle IDs, not in-browser cameras. All other field types validate normally.
The save icon validates if the user has incorrectly filled out any fields within the workform.
Any email address may be used to submit the workform. The user that requested the workform will be audited as the user that completed it.
The workform is reusable once received. If a user closes the workform to reopen it, the workform will be empty for a new submission. A user is not able to close a partially completed workform and reopen to finish later.
iOS is currently not supported for HTML Offline
Instrument Dashboard
Transmissions per day: All CCM instrument transmissions including heartbeats and instrument bottle transmissions.
To view the transmission count hover over the data points.
Details and Analytic Graphs
Incomplete bottles: Graphics show all unregistered bottles sent from the instrument to MLA.
example - if client has submitted 100 bottles in total from instrument, and only 60 were registered on MLA, then incomplete are 60%
Incomplete batches: If there is an error on the final JSON, it will result in an incomplete batch. An errored JSON will not be sent to Data Harvester. The graph calculation = total number of invalid reports/total number of complete reports.
Instrument Uptime: Calculation of instrument uptime.
Instrument Timeline: Interactive timeline log of all instrument transmissions including heartbeats and transmissions.
CCM False - a non-sample bottle transaction (registration, heartbeat, validation bottle)
CCM True - a sample bottle transaction
Reissue Report
Steps to View and Edit a Submitted Sample Registration
Users with 'Can Reissue CCM Report' right can view and edit CCM logbook sample registrations post-report issuance. Bottle IDs cannot be changed during the editing process.
Only the most recent report can be reissued.
Navigate to the Asset tile.
Use the Asset Search to locate the desired asset.
Select on the asset to open the Asset Details page.
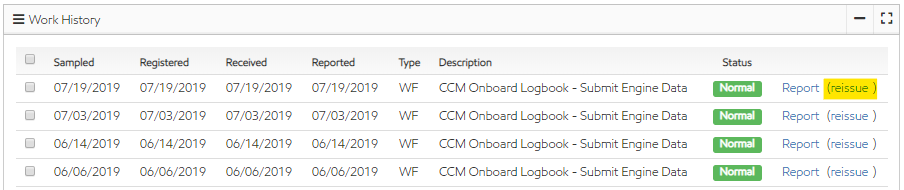
In the Work History section, select Reissue to the right of any sample.
Edit data.
Select Complete Report in the upper right of the page.
Select Submit Report in the upper right of the page.
The report will go into a Processing status for a few minutes. Once report has filed back it will have a completed status which will allow users to view the new report.
A user will not be able to change the Registered Date through the reissue reports screen. The UI does however allow a user to change the Sampled date.
CCM Instrument
Registered
The units are “registered” while at the instrument manufacturer. This process results in the installation of a unique system key on a unit. It is initiated from the unit and will return a unique key associated with the serial number. The key is stored on the unit. This is a secure process that requires special credentials only available at the manufacturer.
Deployment
“Deployment” is performed on a vessel or at DSI. This involves running a script on the unit. The script performs a complicated process. Successful deployment has five results:
The unit becomes associated (by serial number) with a specific vessel.
The unit network is re-configured for a specific vessel.
The unit calculates a shutdown date and stores it on the unit.
The unit sends the shutdown date to MLA (shows in CCM Instrument List.)
The unit is set to run the x-ray safety training session after reboot.
To “pre-deploy” units for off-line mode, adjust the “shutdown” date if installation exceeds 10 days after deployment.
Shutdowns
Shutdown date = deployment date + 3 years + 10 days.
The shutdown date is automatically applied when the unit is deployed.
A kill timer in the instrument is started and set to expire. This is set by XOS (the instrument manufacturer) and typically is around 36 months from the date the instrument is activated. However, this may vary. As of March 2022, the current interval XOS sets is 3 years + 10 days after the instrument is first activated. The instrument displays warnings at 9, 6, 3 months and weekly during the final month before shutdown.
Email reminders and notifications for CCM are handled via Stakeholders. These are individual email addresses assigned to an account. Each stakeholder receives email reminders and notifications for activities on an account.
Emails sent by the system:
9-month warning
6-month warning
3-month warning
weekly warning
final shutdown
If CCM wants to have the instrument lease extended or renewed, CCM will need to manually reach out to XOS renew them.
Disassociate Instrument
Instruments can be disassociated from an account. All data but instrument registration will be removed, freeing up the instrument for reassignment. Data deleted are the shutdown date, order #, account, parent account, and all transmissions except the ones related to the registration.
Open the Instrument List tile.
Search for the instrument list on your account. Select the link for the instrument on the serial number.
On the next screen, select the button for “Disassociate Instrument.”
Select ‘yes’ on the confirmation window.
You will see another alert that an email will be sent to your inbox once it has been completed.
After receiving confirmation email, cross-verify the disassociation of the instrument from the account. Within the instrument tile, the serial number will be indicated by a red X under the “Active” column.